Thursday, January 26, 2006

I Couldn't Resist

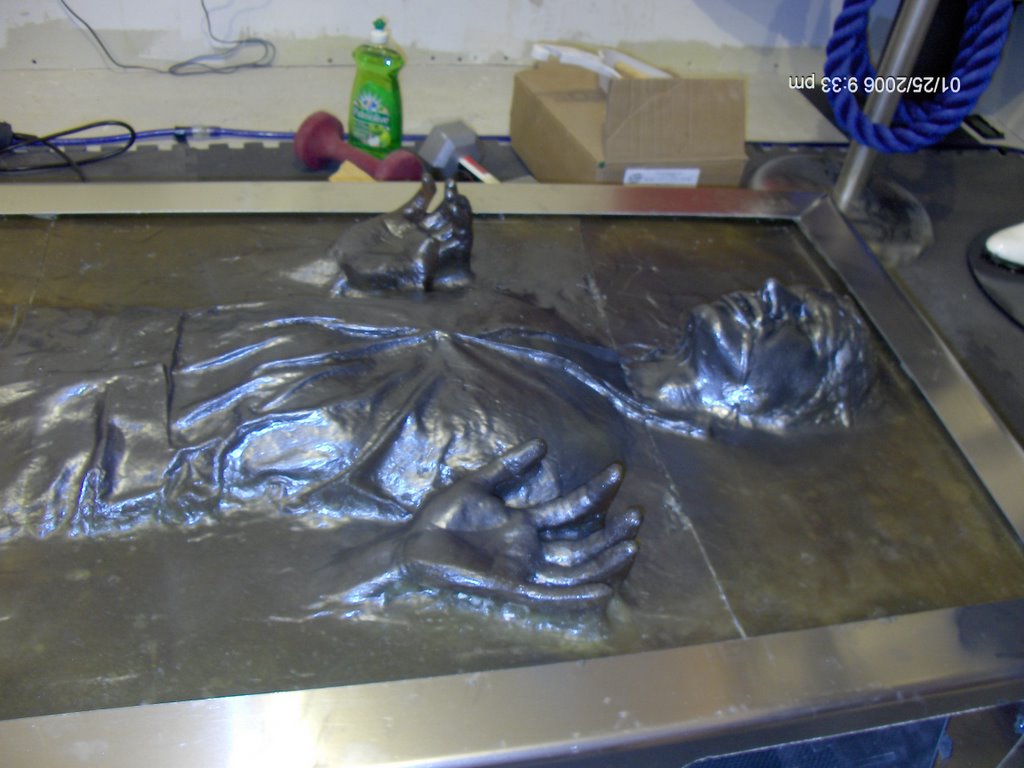
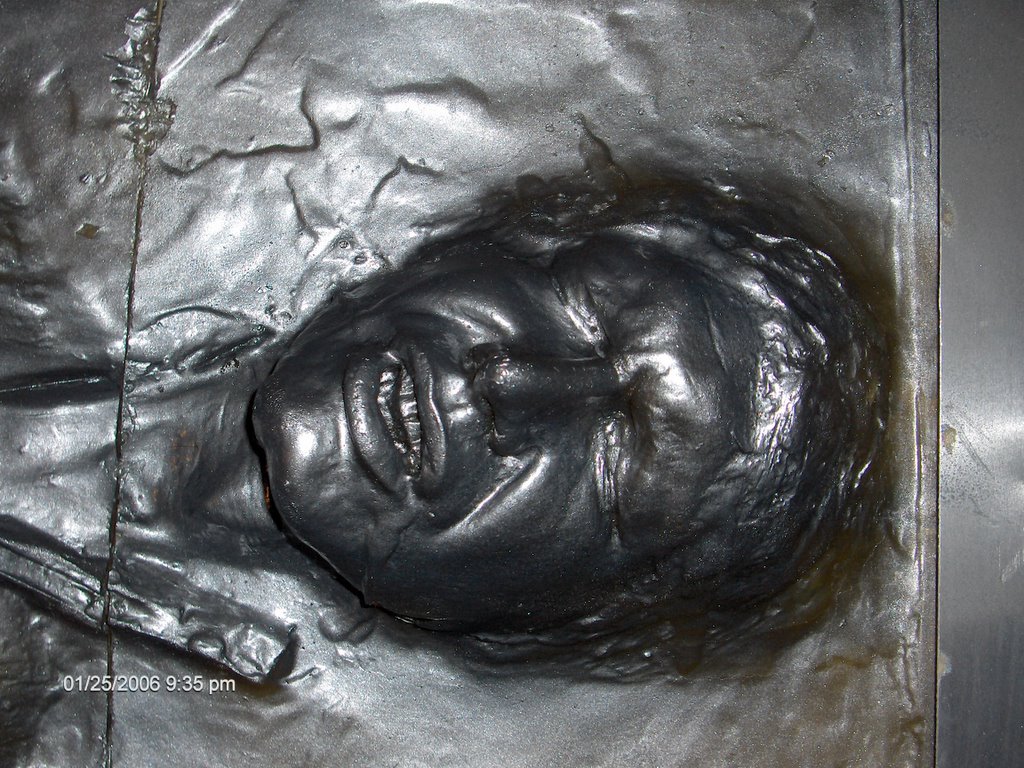
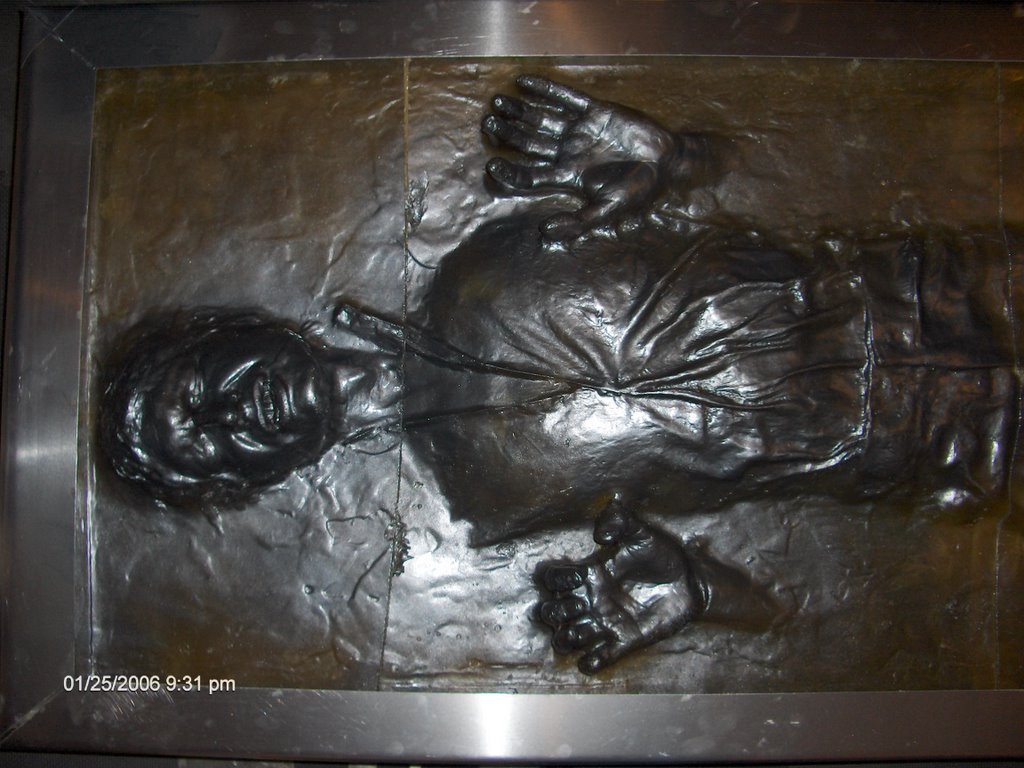
I was finally able to turn Han over and clean up the top (most of the glue had dried). This was the first time I was abble to inspect my heating/flattening attempt. It did make quite a diference. Not perfect, but a LOT better than it was.

I had to reglue one of the broken fingers. The glue didn't adhere too well to whatever chemicals were used in making the Han Casting. I washed it and dried it...and I really wanted to see what it will look like with some paint so I blasted it with a little. I will be filling holes and seams so this will get sanded away and covered, but I just wanted to see.

I was pretty impressed. As soon as he has the paint on it picks up the details a lot better.


Monday, January 23, 2006

R2...with 2 legs!


I finshed of R2's second leg over the weekend. It wasn't too much work considering I had most of the detail pieces al ready to go when I did them for the first leg.


He's starting to look more and more like the real deal now! Next will be the last shoulder hub piece (covers the bolts attaching the last leg), then I will make a center leg, then I gotta make 3 feet. It's not over yet....

I also spent soem time heating up my Han Carbonite and trying to flatten it out a bit. I was pretty successfull. I have seam #1 glued together and drying now..so I will have to glue seam #2 & 3, then I can begin the body filling and final celanup before painting it.

We stopped in a local dollar store last night and I found a couple "Money Magnets" that I used to mount R2's restraining bolt (the aluminum thing on his front. I glued one magnet to the bolt and one to the inside of his body. Now the bolt is removeable, just gotta pull it off. Cool!

We also found some inexpensive frames, so I finally framed a few hand drawn & signed Disney sketches. I think they look pretty cool!!!

Thursday, January 19, 2006

Han Update


I wedged some pieces of plywood behind the Han panel and glued them in place. I have a few spots where I need to reglue and cl;amp to the frame, but I did get some of the curve out.

I have to glue and fill the seams and edges now..lots of work. I think I'll do a little here and there and focus more on getting R2's second leg done now.

Wednesday, January 18, 2006

Glue, clamps & the mess!

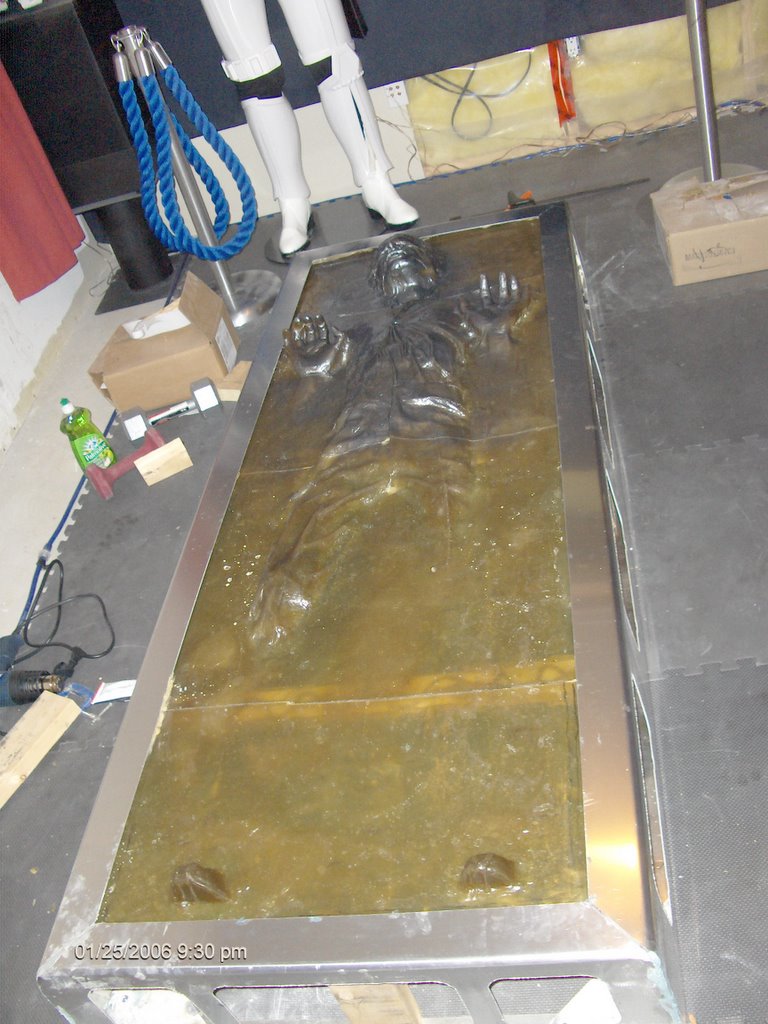
I spent last night working on my Han in Carbonite. I tried to heat up the lowest panel to see if it would bend if it got hot enopugh. I had it hot to the touch and it was still quite brittle. I decided I had to just glue it in the frame as it was. I marked the pieces where I felt they would be centered in the frame and glued them down (after dremelling and sanding all the edges).

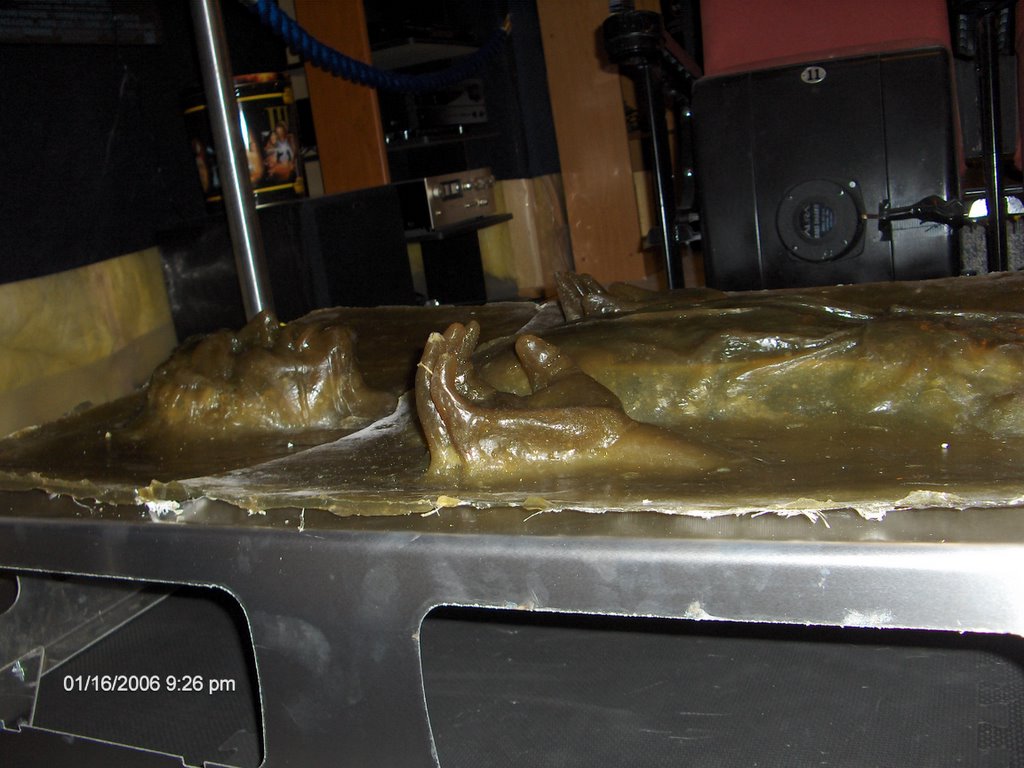
The curve of the pieces and the eneveness proved to be a challenge (and here I thought this project would be easy). Once I had lots of glue around the edges I set various weights and heavy objects to hold it down flat. Didn't work too well. I took a 2x4 length of plywood and ran it down the middle (lengthways), and tried to use spreader bars at the ends to attempt to flatten the curvature and hold the edges down for the glue to set. It didn't work too well..I guess the $9 clamps were not good enough. I ended up usning a c-clamp at the top end (by Han's head) and clamping it from the outside. I wanted to avoid this because if I clamped form the inside I could leave them there.

Tonight I will try to cut lengths of plywood to brace the panel against the front of the frame (they will wedge it from the back of the frame). That should work. This will make it look kinda bad fromt he back, but you wont see that. I may make a cover for the back after al is said and done, but I don't want this to get too heavy.

I didn't have enough time to get any work done on R2's leg.

Tuesday, January 17, 2006

It arrived....finally!!!!!!!!!!

I finally opened my mailbox to find 2 slips telling me to go to the 7-11 post outlet and get my boxes. I went and stood in the long line, and fminally they brought me my 2 huge boxes. They barely fit in my car and one was leaking foam popcorn like crazy.

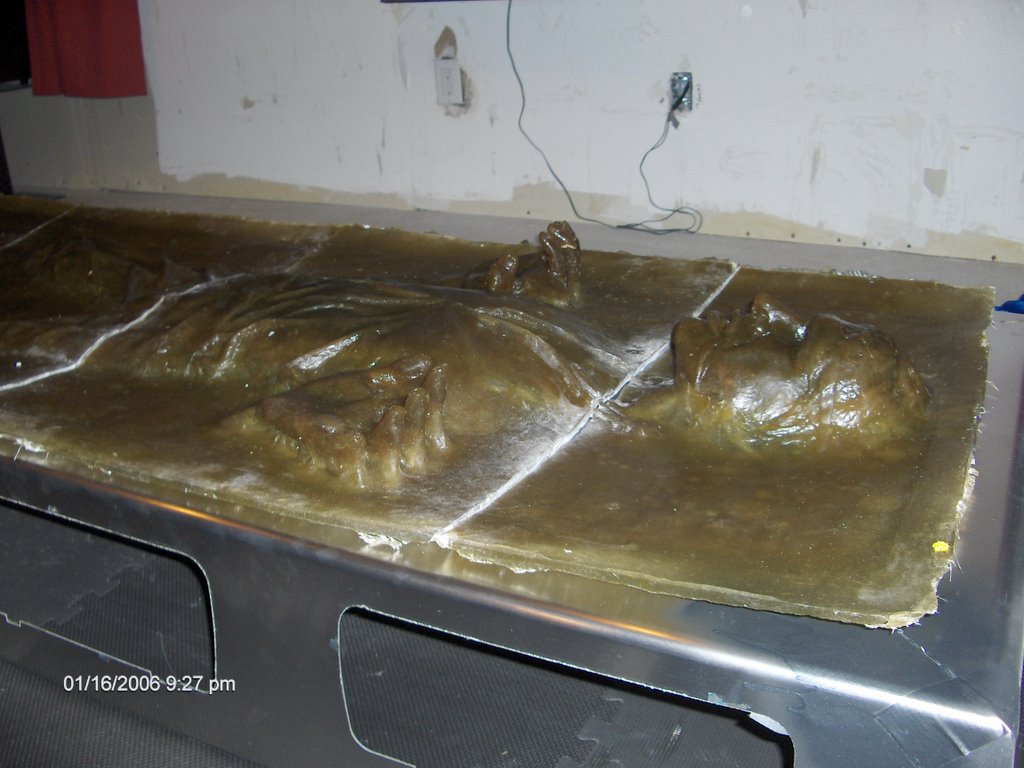
I got home and opened 'er up. I pulled out all the pieces and set them on the floor. The first thing I noticed was the curve they all had. I don't think they are supposed to be warped like that. He was also missing 2 fingers that must have broken off in shipping. Damn. I found one in the box, and the other was nowhere to be found amongst the piled of packing popcorn.

I then toyed with trying to push the pieces flat..and I gently did this and heard cracking sounds, so these things really don't have a lot of flex to them. It was then that I saw something taped to the bottom of on of the pieces....my missing finger. I set these things up on my aluminum frame that I made. Right away it looked better to me, and the curve didn't seem so bad. I glued on the broken fingers and took some pics.


I spent some time working on R2's leg #2 after that. It's going pretty good.

Monday, January 16, 2006

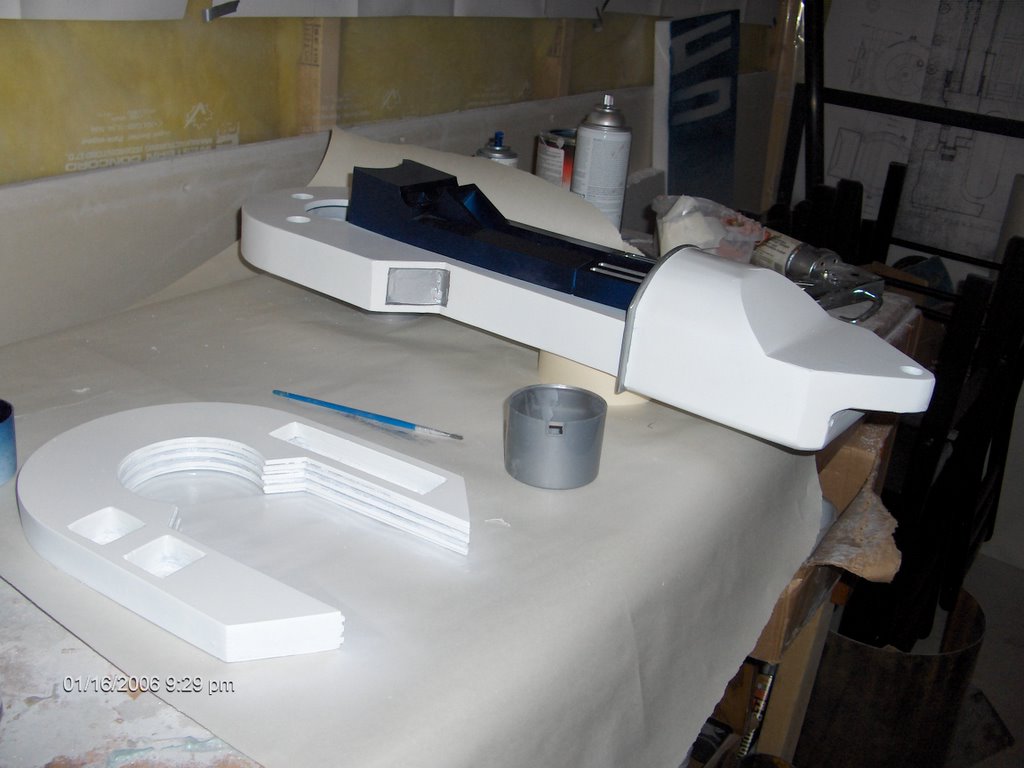
R2D2 Leg #2 progress


I stayed up until 2am friday night using body filler and sanding leg #2. I finished sanding sunday morning so I moved the cars out of the garage and set up my little heater. Seems like every time I want to paint it is cold and snowy.

It worked out pretty well in the garage. The paint would only dry if it was in the warm area so I had to keep moving the heater around and re-applying coats.

I painted up most of the detail parts when I did leg #1 so this one should go together pretty quickly.

Yes....still no sign of my Han in Carbonite Panel. The guy isn't returning my emails either. Did I get ripped off? Stay tuned for updates.

Thursday, January 12, 2006

Leg #2 FINALLY!!!!!!!!!!!!!!!!!!!!!!!!!!!!!!!!!!!!!


I just got my welded leg #2 from the guy who welded it for me! He did a good job and welded up al the seams, filled in gaps and grinded it smooth for me. There are some areas where sanding and body filler will be needed, but this leg will be a lot less work than leg #1 was!

YAY...now I get crack-a-lackin'.

:)

Tuesday, January 10, 2006

Bye Spidey!

I never really finished Spidey, but I think it's time to let him go. I hung him up for our New Year's party just to get him out of the way. We are going to slowly drywall and finish the basment, and since he doesn't really suit the Star Wars theme I have going I decided he just isn't right.

Luckily I have a friend who has a little son who loves Spider-Man, and they also have a large basement with a lot of headroom so I asked if he wants it. I think it will be a cool surprise for his kids. I'll just have to stuff his hands and feet with something easy. I hope they are able to hang him without obvious strings or ropes. Bye Spidey...I hope you have a good life with your new family!!


My 2nd R2D2 leg should be done welding any day now..and I actually mean that. I should have had this guy doing it from day one! I am getting him a bottle of something for his troubles. I wish I could take back the 2 cases of beer (of 3 that I bought him) I got the other guy since he was full of promises, but never delivered. Oh well. That was the last time I will trust him.

I still have my heart broken every time I check my mail. That Han Solo panel was supposed to ship in 4-10 working days. It supposedly shipped on Dec 19th. That put us at 12 business days (not counting holidays) and 22 regular days of axiousness. :( I have been waiting 7 months..WHERE IS IT?!??!?!

Thursday, January 05, 2006

Leg #2 Update.....and Lightsabers

Here is a pic of my Force FX Lightsabers which are now hanging among some of my autographs. It was my wife's idea to hang them like this..and I like how it looks!

Yesterday I asked a different person to weld up my 2nd R2D2 leg. I went out this morning and he spent 1 1/2 hours on it..and it is all together....just needs to be cleaned up and finished welded!! He figures he should be done with it within the next couple days!! I shold have asked him MONTHS ago! I wish I could take back the beer I bought the other guy, but oh well.

Still no sighn of my Han Solo in Carbonite. I check the mail every day..and my heart breaks a little every time. :(

Wednesday, January 04, 2006

Nothing to Report

Wel, it was a busy Christmas and New Years so I havent had a chance for much of anything. I am STILL waiting for R2's second leg to be welded. I decided to take the loss (3 cases of beer I bought a guy who was supposed to weld it for me) and get another guy to do it. Now I just have to figure out where that first guy hid all the parts.

Meanwhile my Han Solo in Carbonite panel supposedly shipped on Dec 19th. Now it is Jan 4th....and it still hasn't arrived. It wil be in pieces in 2 boxes..but no sign of them.

So here I am with nothing to report.....

Friday, December 16, 2005

Darth Vader..back in black


Well...my Darth Vader had a pretty undiginified moment the other night I tried to turn him a bit..and I noticed he was hunching badly. I realized his left knee wasn't in place so we had to do some quick surgery and gluing. Once the knee was fixed I tried again...and now his hip was out. Damn!

I had to hang him by an extension cord, reglue his hip, and let him hang for a day. Looks pretty sad like that with his belt off..pants around his ankles.


Here he is after being fixed. I think he is standing taller than ever...so it was worth it in the end.

Thursday, December 15, 2005

R2..one leg....and a hub


I just added the hub that connects the leg to the body. Leg #1 is mounted with bolts...and there is nothing more I can do.

The guy supposedly welding legg #2 said he would meet me after christmas to weld up leg #2.

In the meantime...I wait....

Behind the big R2 on the right is the interactive one that wasn't working a few weeks ago. I just got it back from that guy who fixed it..and it works 100%. I just have to gut him again and mount the electronics in my big R2. This will bring some life to him...cool!!

Thursday, December 08, 2005

Lightsaber, RC Toys & ONE R2D2 Leg DONE!

I heard from a friend yesterday who lives in Nanaimo (Vancouver Island) that he saw a Force FX Lightsaber Replica at his local Roger's Video. I have wanted one for a long time and I was kicking myself for not getting one when they had them at Best Buy, so I called around and found a local Roger's that had them.

It is pretty nice. Feels like it is a quality made item, and it makes sounds based on your motions. It also has sounds when you hit things (which I don't want to do too much), and power up, and power off. The coolest thing is when it turns on or off the light in the blade extends and retracts. It is really pretty bright too. I have been playing with Scout (one of my dogs) with my toy lightsabers..she loves to try to catch it while I am trying to smack her in the butt with it. This one I have to tell her, "No.". Poor dog.


In the above picture (on the left) you can see a couple Remote control trucks (one is a truck, the other is a Jeep Wrangler). They are for a couple needy kids for christmas. At the mall they have a tree with kid's names on cards..so we grabbed 4 cards. The cars are for a 12 year old boy and a 7 year old boy. The great things about these is that they come with rechargeable batteries and a charger. I was sure to get RC's that had that, since a family that can't afford gifts for christmas, likely can't afford batteries all the time either. I hope they enjoy them!!

I am now completely DONE leg #1 for R2d2! It now has the cylinder at the ankle and a couple buttoms in the shoulder square holes (on the far right at the top). The guy welding up leg #2 was SUPPOSED to meet me at work last saturday to weld it up, but big surprise..he was late and didn't have time. Again he promised to have it done this wekk..but I am not holding my breath. At least in working on leg #1 I did all the parts for leg #2 at the same time..so when I finally get leg #2 it should be a fairly quick process.

Tuesday, November 29, 2005

Hot Dogs.....mmmmm

I have wanted one of these for years. I went to an auction once to get a real one (from a convenience store), but it got WAY too expensive.The other day I happened upon this little thing. It cost $69...a bit pricey for whay you get I'd say, but works pretty good, and I have wanted one for a long time! We used our last wedding gift card to get it.

Needless to say we had hot dogs for dinner last night.


Here is a better pic of that Neon light I got the other day.

Monday, November 28, 2005

Leg #1..almost done!

Well..on the weekend when I had a moment here and there I got a bit more done. I glued a couple more pieces on. The cyliner (at the bottom) and the pieces around it aren't done..I just set them in place to see how it would look. Getting close to finshing leg#1!!!!!


I then put the leg on R2 and now it was too heavy and wanted to pull him over. I set some popcorn spice under the leg to keep him from tipping.


Here is a pic of the entrance to my theater. I found the 'open' light while I was shopping with my little bro on friday. It's kind blurry in the pic, but it is the light on the concession counter.

Thursday, November 24, 2005

More Clutter....Obsessions are bigger than My House

I got news that a local pawn shop had an R2D2 cooler that was used as a Pepsi promotion a few months back. I wanted to get one then, but I couldn't get a hold of one...so this was my opportunity.

I went at lunch time to get it...and it didn't even fit in my car. Too bad I didn't have a hatchback (like Joanne) sometimes. Anyways I paid for it, then went back to work. Luckily laer that day a guy from work was running some work errands int he area so he stopped in and grabbed it for me. He was nice enough to drop it off last night for me. Once I got it in my basement I realized how big it is (bigger than the *real R2D2). I figure once I am done building my R2D2 the workbench and tools can get out of the basement, and it can go over there somewhere.


I also just got an emal from the guy who has my "broken" Interactive R2D2. He has replaced a sensor with one from his R2 and it is WORKING! All he needs to do is get a sensor for mine and solder it in. SWEET!

The other day I saw that London Drugs had some gumball machines with stands. I have a couple cheap ones, but one with a stand would be a nice touch.


I glued the aluminum coloured cylinder into the middle of R2's leg last night. I still have quite a bit of detal work to do on his leg...before I move on to leg #2 (THAT I STILL DON'T HAVE).


Here is R2 guarding my basement....with no legs.


* Yes I know R2D2 isn't real.

Tuesday, November 22, 2005

Some Leg Progress


Well..I got past the bolt fiasco! I did have troubles last week drilling 3/4" holes in the main body for the bolts to go into. Lesson learned...don't spend $9.99 on a set of hole saws at Canadian Tire when you can get one hole saw base and one blade for $30. Good deals have to actually work to be a good deal!

I put some more detail parts on the leg..then yesterday I realized that one part should have been painted aluminum colour before (in this pic it is the flat part on the right). I did some carefull masking and got is the right colour now!


Here is a shot from the other direction. See the scrathces? They aren't real..I used paint to make them. One day I have to do this all over to make R2 look like he's been through hell in the Star Wars universe. It's going to be tough to do that too him, but weathering will make him look more real, and hide some flaws.


Thursday, November 17, 2005

A Week of Getting Nowhere

I finished sanding my R2 leg down and put on a few coats of paint over the weekend. Sunday I figured I woudl start assembling the details on the leg, but found that paint had scratched on the botom so I hung it up and repainted a few more coats.

Monday night I was going to assemble, but I realized that the minute I put the detail pieces on the outside I no longer have ANY access to the bolt heads I will use to fasten the leg to the body. Off to Home Depot I went...god I hate Home Depot. I spent over an hour in the bolt aisle trying to find the bolts I needed for that and a few other things. That place sucks! I wanted 3/4" bolts....they only had up to 5/8"...so I went with 5/8". Then I couldn't find nuts becasue they go up to 1/2", then washers were in a different place, and I finally found some nuts in a completely different place...AARRGGHH!! Anyways.I got home to find that the 5/8" bolts would not go into the leg at all because of the bolt head......so back to the drawing board.

Tuesday I ordered some 3/4" threaded rod that will work..but I had to get them cut to length, so I had to wait for that to happen. Tuesday my INteractive R2D2 toy arrived (I got on ebay). It was returned because it was missing legs...which is why I got it. The plan was for me to take it apart and install it in my full sized R2d2 so that when you talk to it..it will answer you. Unfortunately even without legs this thing had problems. It would not "boot up" properly, and it's head would turn all the way one way, then back. It wasn't able to figure out where the center of it's head was to position. I took it right apart (see picture below) and I THINK the trouble was an infrared mitting and reciving set of diodes that look for a tooth on a wheel that turn with the dome..but I don't know how I could possible prove that or fix it. I went to bed discouraged and frustrated.


Wednesday...I exchanged a few emails with a guy in the r2builders group who did with his full sized what I want to do (using an interactive R2d2). He was very kind and offered to take a look at it for me. Wednesday night I put R2 back together (sort of) so I could ship it. Then I wanted to mount the threaded rods I finally got in the legs...MORE problems. It was working, but I need to have a hex nut on the outside of the leg, and the 3/4" hex nuts are too thick...which would make the space between R2's body and his leg too large. I tried to cuz the hex nut in half with a jigsaw...but that was a futile effort. I went to bed frustrated again.


Now it is Thursday...GOD I hope things start working out. I went out at lunch and bought some thinner hex nuts...and I shipped the non-working Interactive R2D2 to that guy who will look at it for me. Tonight I plan to mount the 4 bolt assemblies in the leg..what can go wrong now?!?!

Next on the agenda is to drill holes in R2's body so I can fit these bolts through. I have printed out a template to use as a guide to locate them. I need to drill 13/16" diameter holes...which will be another challenge, since I have a small cheap drill. We'll see what I can borrow from the shop. Once I am confident the legs can be fastened this way..I can then do the finish details to the leg. I will have a set of holes so I can mount the leg in 1 of 2 positions...vertically, or on an angle for when he is in 3 legged mode. A lot of people in the r2builders group made their R2's so that with the press of a button his center leg will retract and he will stand up straight (legs turn). This is beyond me so I will just have him fixed in a 2 legged vertical position, OR the 3 -legged "reclined" position. For now I don't have any feet so I will just hang the legs vertically (R2 is sitting on a stool so his legs aren't touching the floor).

Of course I STILL need my second leg to be welded together. I really wanted to be doing 2 legs at the same time, but the guy who is weling the legs keeps promising and not delivering. I appreciate him doing this, but so far I have bought him 3 cases of beer and waited for about 4 months!!!! He keeps saying "This week for sure!"..and then nothing happens. Welding aluminum is tricky and he is a really good welder..so I have to be patient..but man!
Tuesday, November 08, 2005

R2D2 Update #2

I have been working on my R2D2 legs lately...wel one of them. I am still waiting for the second leg to be welded up, but I decided I didn't want to wait any more so I got to work on leg #1. It was made in several pieces that were welded together, then I have been working with body filler to smooth the seams, and fix any holes, etc.

In this pic you can see the legs and the sholder shims that I made out of several pieces and glued together. I am again using body filler to make the edges smooth. I made the curved part at the bottom of the leg last night (after getting the pieces cut out like the one you see in the center of the pic.


The blue pieces go on the middle of the legs, and the various aluminum painted pieces go in various places. I ordered all of those pieces from a guy in the US who makes them for people in the r2builders group. They are really nice and saved me a lot of effort!


I should be able to paint the leg and start assembling it within the week I hope.

Monday, October 24, 2005

Hallowe'en Jack o' Lanterns


Friday night me and my little brother carved up a couple Jac o' Lanterns We had 30 to choose from (that I found online), but we both picked the same one.

Mine is the one on the left, his is on the right.