Tuesday, February 28, 2006

Yoda's Saber...Completed!

I received Yoda's blade yesterday so I cut it down...and fit it together. There wasn't room for the batteries and switch so I will have to hide them on Yoda's body somehow.

The hardest part was trying to clean the blade out after I used my dremel to cut it to length. There was dust and pieces in the tube..DOH! I managed to get a stick used for herding sheep (another story) and I taped some cloth on the the end to clean it out. It worked pretty well.

Anyways..here are a couple pics.


Here is an idea of how it will look next to Yoda (aka Happy Stickman).

Saturday, February 25, 2006

Luxeon Dreams

I have been busy today....I wired up my Luxeon light for my Yoda Lightsaber...and made a few changes to fit it all inside (batteries, light, light driver, and a switch..and wires). The end cap had to go...but I'll come up with something...


I also finished painting my Mal Gun (from Firefly) and the Voice Recorder. In this pic you can see pictures of the real props in the background. I am very pleased with how they both turned out. The voice recorder gave me a chance to try out my airbrush...before I try it on Yodas skin.


Friday, February 24, 2006

Firefly/Serenity Display Progress

I found a couple hours to work on my Firefly/Serenity Display a bit last night. The night before I primed the resin gun, so I painted it black. I then took a dirty brass color and dry brushed it to make it look old and worn. The last thing I did was take a brighter brass color and went over some of the prominent edges to make them look more worn. I am VERY pleased with the results. I still have to paint the trigger and some parts with a gunmetal color, and the handle a wood color, but it's really taking shape.


I also framed my autographed pictures from Summer Glau and Alan Tudyk (they are from the show). I hung them and my Autographed card (hand signed by Alan Baldwin) and a Pieceworks card that is an actual piece of the shirt worn by Nathan Fillion in the show (Captain Malcolm Reynolds).


The last I did was work on my Voice Recorder prop. It's actually a little radio that I cut down, put a new end on, filled the gaps, sanded and primed. I painted it by hand


Wednesday, February 22, 2006

Yoda's Saber

Ok..it looks a little rough, but when it's in Yoda's hand and has a blade that lights up..I'm sure it will be good enough. I put my Darth Vader Force FX sabe next to it for a size reference.


I received his eyes in the mail yesterday. A friend of mine loaned me a compressor for using my air brush, so now I just need the head, feet and hands to arrive. The guy making them said he had a bad batch of latex so he had to order more in..so it should ship soon I hope.

In the meantime I finished sanding my gun replica from the show Firefly. I was washing it just prior to priming last night but a piece broke off...DOH. I glued it back on, but now I have to clean that up tonight. I also took a little radio that was used as a vioce recorder prop and cut it down to the right length. I glued the ends on..so I'll have to clean that up too.

Tuesday, February 14, 2006

R2 Standing on his own!!!!!!!!!!!!!

I know the feet will take me a while, but I wanted to see what R2 will look like standing on his feet. Last night I mounted the center leg, tilted the side legs back and mounted 3 temporary feet so he could stand. It works!


Monday, February 13, 2006

Say Hello to my Little Friend

Well...I didn't want another project....but I got sucked into tempatation. I have been thinking a Yoda would be nice to have.and small. The trouble is the replicas are expensive..and it isn't like I can hide the face and hands and feet (like darth vader or a Stormtrooper). I found a guy onine who is selling a latex casting of his head, hands and feet.

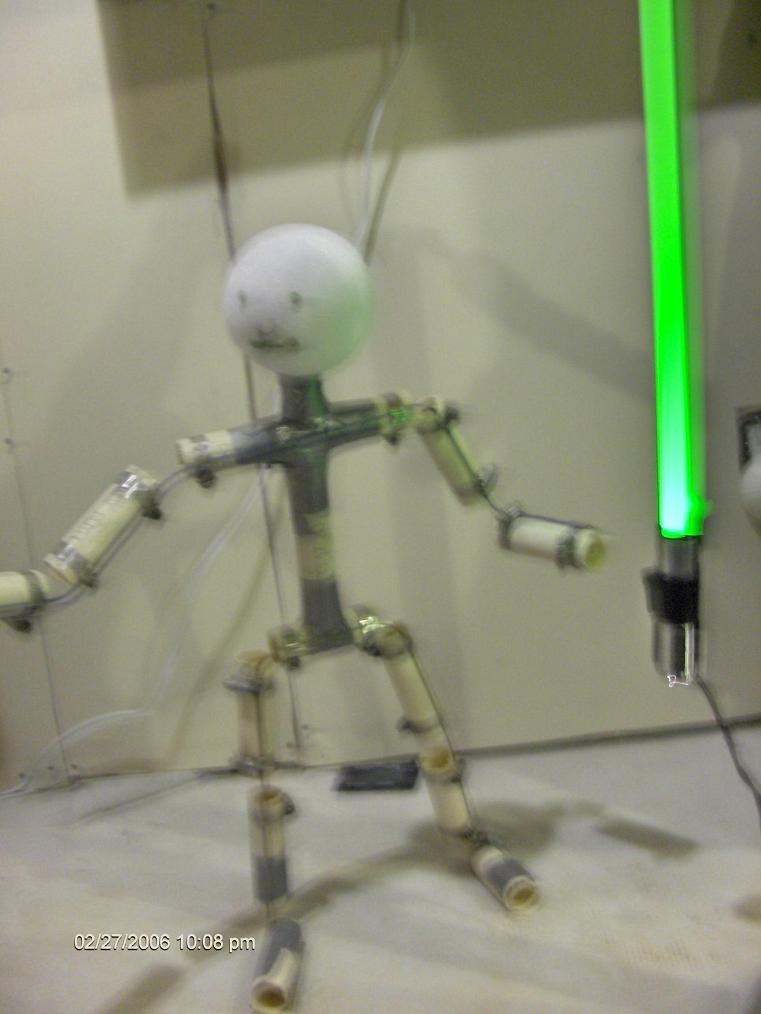
This will be an episode II yoda.so he's not as old..and can do some moves, so his pose will reflect that. Yesterday I made up this little skelton using a couple picstures as a reference, knowing that he stands 26" tall. Once I get the head, hands and feet I can finalize the pose, and bulk it up a bit.

I also ordered a toddler sized costume on ebay....it was that or baby sized. I kinda think I should have gone with the baby size, but if it's too big I can always cut it down a bit. The other challenge has been finding some decent eyes, but I think I found a place so I can order them today.

Painting the latex green will be a challenge. I am planning on using an air gun, but I need to find a paint that will not react with rubber, or chip off and flake. Apprently the paint they use for latex masks is acrylic with rubber cements dilutes with hexene or something. It is supposed to be quite toxic..so I think I will avoid that. I painted some green fabric material on my hand and some acrylic..so see how they looked when they dried, and how they would crack and flake. The fabric paint seemed to work pretty good so I think I might try that..if I can figure out what to dilute it with.

In this pic you can also see R2's middle foot. I painted it white yesterday. It will go on the bottom. I plan to mount 3 temporary feet for him to stand on whil I work on his real feet.


Here is a quick pic of my Firefly/Serenity Display. The magazine Rack and Cutlery holder were just bought at Ikea (they were used in the show). The gun is a first generation replica (it was molded from the original one used in the show). I printed out the money and the Voice recorder is actually just a $3 radio I have on order that was cut down and painted.

Monday, February 06, 2006

Han Update, painted!

Wow...that was a messy job! Body filler everywhere, paint and bondo fumes to contend with (which means windows open in winter..COLD HOUSE!).

He turned out pretty good. There are a few flaws, but I'm not going to worry about them. I poured some resin on the flat parts to add detail...it tended to smooth over too easily. On saturday I ranout and got 4 tubes of 5 minute epoxy. I could apply that more accurately..and it gave the perfect texture. Most of the "hardened liquid swirls" you can see in the pics were done by me. I tried to blend them as well as I could and incorporate liquid runs front the face, and body into the patterns.

Here are a couple pics!


Thursday, February 02, 2006

Not much news..Han in Carbonite update

I worked my butt of last saturday filling the ednges and seams and sanding them smooth. I don't feel the seams will be hidden too well so I decided to get some liquid resin. I will try to pour in the same pattern as some reference pictures I found (only on the flat parts) trying to duplicate the "hardened liquid" look. I figure this will give it a more realistic look since a lot of the ripples seem to have smoothed out in the casting process. The other advantages are it will cover the seams with a smooth flat finish, and fill some of the air bubbles.

The trouble with bondo is it smells really bad. We had almost every window in the house open and it still stunk. Then the house gets nice and cold because it's snowy and cold outside. I can't very wel haul Han to the cold garage, or outsiide. They are too cold, and I don't even know if I could get Han out of my basement (tight corners). One day if we move I think Han will have to go out the window. The other trouble with bondo is when you sand it..DUST DUST DUST!!!!! Once I am done this I will be cleaning the basment for a week!!!!!!

Anyways I am hoping to bondo and sand the remaining edges, then I can clean it up and pour some resin.